

However, unlike Windows Hello™, which provides a straightforward facial authentication setup, most Linux distributions, including TUXEDO OS, lack built-in, user-friendly facial recognition options. So, is it feasible to enable facial authentication on Linux? And what choices are available to achieve this?
This article is sponsored by TUXEDOComputers, a German company that produces Linux hardware, notebooks, computers, and more. Always and forever, all ideas and opinions on this website are wholly mine, as my values are not for sale. To learn more, read our Code of Ethics.{alertInfo}
{tocify} $title={Table of Contents}
Howdy, the Only Option!
Linux is well-known for its diverse software options, but when it comes to facial authentication, the situation is quite different—there's only one option available: Howdy.
Howdy is an open-source facial authentication software that provides a Windows Hello™-style authentication experience. It is a command-line Python software with numerous customization options, including timeout settings and snapshots. Howdy utilizes Pluggable Authentication Modules (PAM) to make facial authentication available throughout your system.
How to Set Up Howdy on Your Linux Distribution
Howdy is compatible with most popular Linux distributions, including Ubuntu, Arch, and Fedora. This tutorial will guide you through the entire process of installing and configuring Howdy.
1. Open a terminal window and use the following commands for installation based on your distribution:
- For Ubuntu:
sudo add-apt-repository ppa:boltgolt/howdy
sudo apt update
sudo apt install howdy{codeBox}
- For Fedora:
sudo dnf copr enable principis/howdy
sudo dnf --refresh install howdy{codeBox}
- For Arch:
Install the 'howdy' package from the Arch User Repository (AUR).{codeBox}
Please note that the 'howdy' package is approximately 160MB in size, excluding Python libraries, which will be downloaded during installation.{alertWarning}
2. During the installation, you'll be asked to choose a certainty level among 'fast,' 'balance,' and 'secure.' In most cases, 'balance' is the recommended choice.

3. Configure Howdy to use the correct camera device:
- List the available devices using the 'v4l2-ctl' tool:
sudo apt install v4l-utilsv4l2-ctl --list-devices (The output will display the available devices.){codeBox}
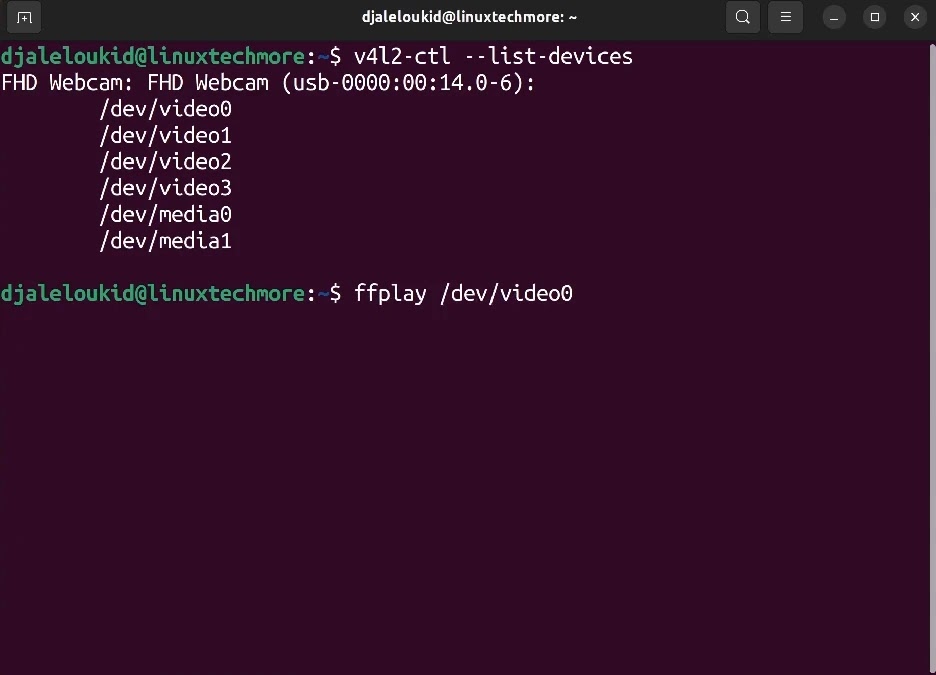
- Identify the IR camera device by using the 'ffplay' tool, part of the FFmpeg package:
sudo apt install ffmpegffplay /dev/video0 (Test each device until you identify the IR camera.){codeBox}

- Open the Howdy configuration file:
sudo howdy config{codeBox}
- Add the IR camera path to the 'device_path' line in the file:

- Save the changes with 'Ctrl+O'.
4. Before exiting the config file, enhance Howdy's security by changing the snapshot options from 'true' to 'false' as shown below:

5. Add your face model by using the following command:
sudo howdy add{codeBox}

- Label your face model accordingly.
Make sure to look directly at the camera, as there won't be a camera window to show you how your face model looks.{alertWarning}
- Now, you can use your beautiful face to authenticate any actions requiring your password!

Unlike Windows Hello, Howdy stores all face models and data locally, ensuring the protection of your privacy.{alertSuccess}
6. Additionally, you can list and remove face models:
- To list the face models:
sudo howdy list{codeBox}
- To remove a face model, run:
sudo howdy remove ID (Replace 'ID' with the specific ID of the face model you want to remove.){codeBox}
7. Enjoy the convenience of authenticating actions with your beautiful face on Linux!
Bonus: How to Configure Howdy for Login and Lock Screen Only
While using your face to authenticate instead of typing the root password can be convenient, it's important to note that this may not be the most recommended security practice. Thus, configuring facial authentication exclusively for login and lock screen purposes is a safer choice.
- Navigate to the '/etc/pam.d/' folder using the 'cd' command.
- List the PAM configuration files using the 'ls' command.
- In the 'sudo' file, remove Howdy by commenting out the line that contains Howdy options. To do this, add a '#' before the Howdy line.
- Add Howdy to the login greeter file, such as 'sddm,' 'lightdm,' or 'gdm':
auth sufficient pam_python.so /lib/security/howdy/pam.py{codeBox}

In theory, the above steps appear straightforward and should be compatible with most Linux distributions. However, in practice, dealing with PAM files can be perplexing.
In Ubuntu, for example, the 'sudo' file indirectly links to Howdy through a common-auth statement. Hence, to deactivate Howdy for sudo, you should comment out the Howdy-related line in the common-auth file.

Since Ubuntu uses GDM (GNOME Display Manager) as the login greeter, you should add the following line to the top of the 'gdm-password' file:
auth sufficient pam_python.so /lib/security/howdy/pam.py{codeBox}
Then, remove the default installed PAM configuration by running:
rm /usr/share/pam-configs/howdy
pam-auth-update --package{codeBox}

These steps ensure that Howdy is configured only for login and lock screen authentication. Similarly, you can manually add Howdy to any PAM files in '/etc/pam.d/' for other specific use cases.
🗨What do you think about the current state of facial authentication on Linux? And would you consider using it on your Linux notebook?
At Linux-Tech&More, I'm committed to providing you with an adsense-free (and automated ads-free) reading experience. I believe in delivering uninterrupted and user-focused content. If you enjoy my blog and would like to show your support, you can do so viaYour support makes a difference!{alertIdea}

Hi! I have Fedora 38 (really Nobara 38) and i did all that stuff but howto make work it on my system? Looks like missed step like enable service or something. When i make tests its work good but when i restart i have password promt on login and as i do something with sudo
ReplyDeleteI'll test it on Fedora, and welcome to your blog. I'll let you know how it goes.
Delete